
A rotting transom is one of the most serious problems you can have with your boat. It threatens your safety and the structural integrity of many components attached to it. If you suspect a transom is rotted, tap around it with a hard object to listen for a flat or dull sound compared to the resonant sound of a solid laminate. Check for other telltale signs of rot.
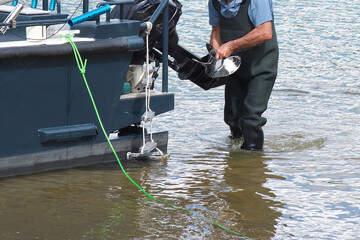
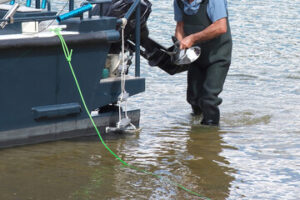 Boat repair expert will often cut a hole into the transom skin and take a core sample. This will give a true assessment of the condition of the transom’s interior.
A damaged transom is a serious structural problem for any boat. It allows water to penetrate the hull and compromises the transom’s integrity. This is particularly dangerous for center consoles and runabouts, where a soft transom can lead to engine failure or even sink the boat. Regularly inspecting your transom can help prevent such problems. However, an experienced professional must assess the issue if you suspect your transom is rotting.
While a marine surveyor will likely use a moisture meter to examine a transom, it’s a good idea for boat owners to try a quick test themselves. Using something like the wood handle of a screwdriver, tap on different areas of the transom to listen for its response. A healthy sound means a solid core, while a dull thud indicates that the wood has softened.
You can also try to determine the extent of moisture damage by drilling inspection holes and evaluating core samples. It’s also a good idea to over-bore any mounting holes that you need to keep (stern drive, anode, etc) so that moisture can be trapped and resisted.
If you can, removing an engine bolt and washing the area of the transom where it was installed is another helpful way to see what the transom looks like underneath the gelcoat. A damp or darkened transom often means that it is rotting and should be replaced.
Once you know the extent of the damage to your boat transom it’s time to start planning the project. First, take measurements of the transom; fiberglass thickness of the outside skin, plywood thickness inside, stringer location and thickness, and so on. You’ll need these measurements later to ensure the new transom will fit properly. Before beginning the demolition, you should wax the outside of the new transom and tape up any old mounting holes, sterndrive or transducer holes, etc. If you’re careful you should be able to see resin ooze out of the old bolt holes once the transom is removed.
When a transom is damaged, water can enter the boat’s structure and rot the wood. This is one of the most common reasons for a boat’s owner to replace their transom. While some boaters have successfully repaired a rotting transom, it is important for anyone considering this type of repair to know that it will be difficult, time-consuming, and expensive. This task is best left to a professional who will ensure that the transom is inspected, properly treated, and repaired, and that all through-hull units are removed.
When the new transom is installed, it is critical to properly waterproof the entire area. This is especially crucial for areas that are exposed to the water. The most important step is to inspect the old transom and determine the extent of the damage. This can be done by feeling around any piece of equipment that contacts the transom (steering wheel, stereo, etc). If any bolts feel damp or wet, this is a sign that there is water leaking behind them and that the transom has already started to rot.
Next, look for any signs of rot, such as brown or brackish water in the engine wells. If you remove a screw or engine bolt and see that water spits out of the hole, this is another sign that there is rot. There are also external tell tales, including gelcoat cracking or crazing in corners of the engine wells. Finally, when weight is applied to the engine, listen for any movement of the transom. If the transom flexes, this is another indication that it has started to rot.
Once the transom is inspected and cleaned, it’s time to start working on repairing the damaged areas. The first step is to treat the interior of the transom with CPES. This can be done by drilling holes through the interior of the transom and allowing it to air dry. Once the interior is dry, the bottom of the transom can be closed with Fill-It epoxy filler.
For the exterior, any holes in the fiberglass will need to be filled and sanded smooth. A polyurethane coating will need to be added to the surface as well. Once the polyurethane is dry, it can be painted to match the color of the rest of the boat.
The transom is an important component of your boat. It carries the weight of the motor and helps support the rest of the boat’s structure. It also protects the engine from salt water and other contaminants. However, the transom is one of the first components to deteriorate in an outboard boat. If the transom is rotten, it’s essential to replace it as soon as possible. Otherwise, the damage can spread to the interior of the hull and damage other parts of the boat. Replacing a transom may seem like a daunting task, but it’s something that most home and do-it-yourselfers can manage. With the right tools, materials and knowledge, it’s a job that can be completed in a few days.
The hull of the boat should be clean and sanded before a new transom is installed. This is necessary to ensure that the new transom will bond properly with the hull. The sanding process should include the removal of any hardware and components that were previously attached to the old transom.
When removing the old transom, it’s a good idea to take measurements. This will help you get an accurate estimate of the thickness of the fiberglass and plywood that will be needed for the new transom. It’s also important to make sure that the hull is supported as you work. Removing a transom and stringers without proper support can cause the hull to deform or even collapse. The best way to prevent this is to use a bunk trailer with additional blocks under the keel and transom.
Another option for preparing the hull for a new transom is to apply a coat of epoxy and let it dry. This will create a strong, waterproof surface that the new transom will bond to. It’s important to choose a quality marine-grade epoxy.
Many experts agree that drying a wet transom will not fix it and can actually make the problem worse. This is because wood restrains water and salt over time, which reduces its resistance and strength. Drying a wet transom can cause the remaining wood to weaken and rot faster.
The first step in boat transom repair is to remove any hardware or components attached to the old transom. This includes things like the motor, trim tabs and swim platform. Once the old transom is removed, the hull needs to be cleaned and prepared for the new transom. The hull must be cleaned and sanded so that the new transom can bond to it effectively. The hull will also need to be reinforced with fiberglass and resin so that it can support the weight of the new transom.
Once the hull is prepared, the new transom can be installed. The new transom will need to be cut to size to fit the hole in the hull. The new transom will also need to be bonded with fiberglass and resin to ensure that it is strong and durable. The new transom will then need to be trimmed and painted to match the rest of the boat.
During the installation process, care must be taken not to damage the hull with tools or sandpaper. If the hull is damaged, the new transom will not bond properly and could be susceptible to water leaks or rot. It is also important to use marine-grade hardware throughout the installation process to ensure that the transom is secure and waterproof.
Another major issue with a timber cored transom is the water that is forced into it by the thrust of the outboard motor. With every gear shift, the motor is forced forward and aft, which creates hydraulic pressure that causes water to move between the timber core and the outer skin of the transom. This water will eventually cause rot and require the entire transom to be replaced.
To avoid this type of problem, check the transom regularly for signs of rot. Look for soft spots and discoloration that may indicate rot. If you notice any of these issues, it is important to act quickly before the rot spreads. Additionally, you can check the integrity of the transom by tapping around it with a hard object. A rotten transom will have a hollow sound when tapped, whereas a healthy one will have a more resonant sound.